Well, I did it people! I succeeded in passing through A Levels successfully, gaining some very good grades in Textiles, Photography and Business Studies. Watch this space - you could see the next best fashion/ textiles entrepreneur to blow your minds!!! But until that happens, I'd like to share several things that I've been doing since I last left you all.
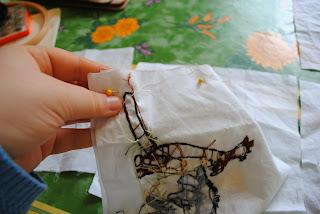
If you aren't aware that I work for a soft furnishings and Haberdashery shop, well, now you do; and in the first image you can see a sample of a Jane Churchill furnishing fabric usually used for children's curtains (which I bought as an off-cut). Now, I adore Winnie The Pooh, and have done since I was a year old, and thought that a child-hood memory would sooth the stress of the A Levels I was undertaking.
 |
| Original Jane Churchill sample. |
So, I drew from eye an image from the sample I had onto a plain white cotton square, and went around the pencil lines with black embroidery thread using back-stitch. I filled in the characters with according colours using satin stitch as this gave the best coverage of colour.
This was just the start. I enjoyed doing this so much that I ended up doing the same thing with the other characters. Not all of the book's characters are on the sample as you can see, but I decided to use images online to fill in the gaps (based around the original drawings, of course!).
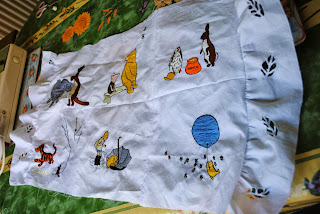
Once I had completed 6 squares, I opted to sew them together, with right sides facing, in a patchwork format, which resulted in the composition below.
But I didn't want to stop there.....
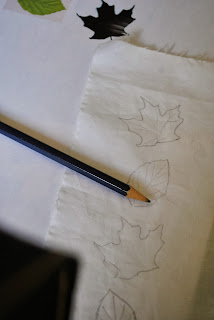
I traced over leaf patterns onto strips of fabric the double the length of the width of the embroidered patchwork, and used a satin stitch on the sewing machine to go around the edges. I used embroidery scissors to cut away sections to leave the following patterns; which for those who don't know is a technique called Cut-Work Embroidery.
Sadly, I wasn't too keen on the way the maple leaf had turned out, as I wanted a more curved line. So, I ignored those and carried on with the other leaves all the way down the fabric strip. I then put gathering stitches along one edge, pulled them up, and attached each panel to the main panel on either side.
Although you can't see it, (purely because I was lazy and forgot to take pictures of the last steps as I was so excited that it was almost complete!), I created another panel for the back, which ultimately allowed it to transform into a cushion cover.
The above photo is its finished self, unfortunately without the cushion as I haven't got one in its size! I am considering to stuff it with toy stuffing to fill it out and then secure it shut so it doesn't come out; but that is a task yet to do.
What do you think? I was so proud of making this despite revising for exams and finish off my tedious coursework that took priority *cough* *cough*.
And so my quest shall continue, as I have many more projects tucked away down my sleeve. Please keep visiting to see what happens next in my crazy and unexplained mind!!
Until the next time,
maddening wishes xxx


